How to Choose a Portable Solar Panel: A Homesteader's Guide
Choosing the Best Portable Solar Panels for Your Power Station (EcoFlow, BLUETTI & More!)
Heads up! This post contains affiliate links. If you make a purchase, The Frugal Footprint may earn a commission at no extra cost to you. Read our full disclosure [here](https://highpoweredsun.com/disclosure-policy)
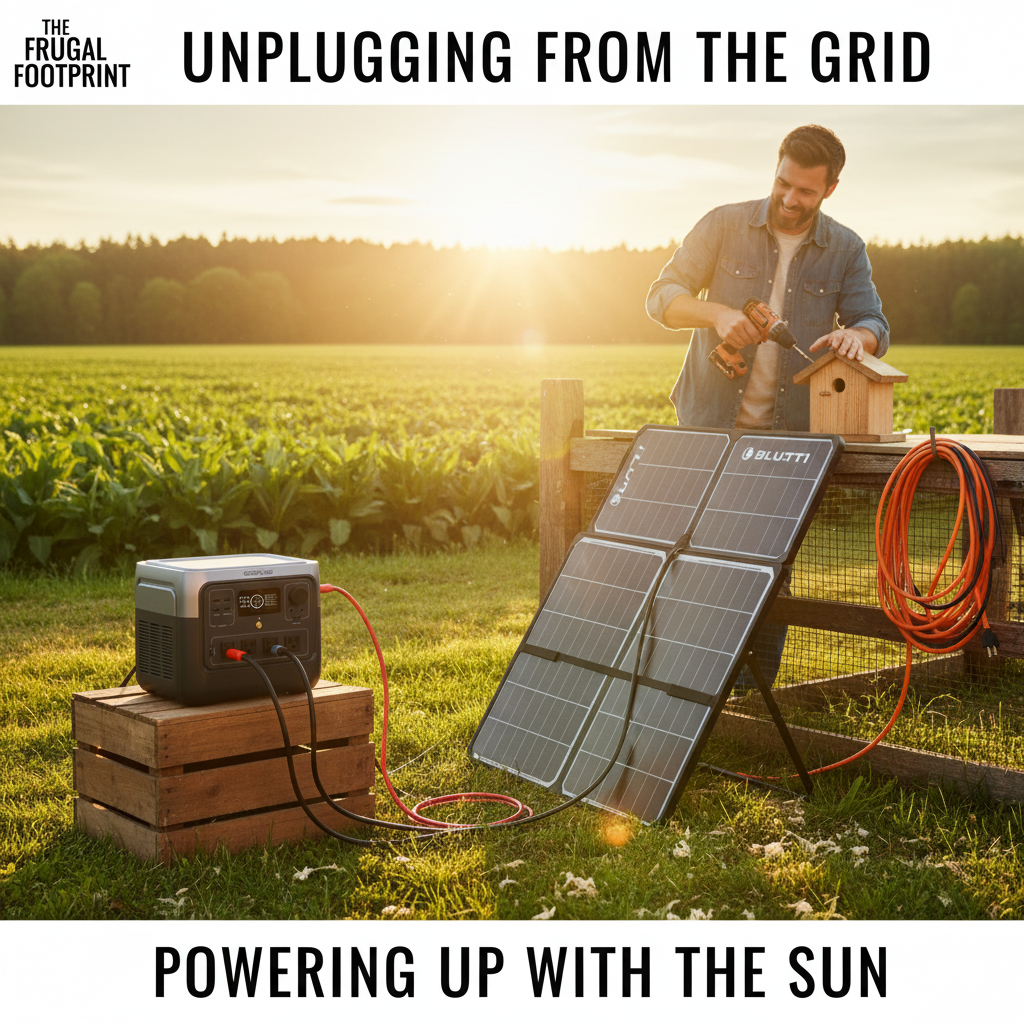
Unplugging from the Grid, Powering Up with the Sun
So, you've got your EcoFlow RIVER 2 Pro (or another fantastic portable power station from BLUETTI, Jackery, or another brand), and you're loving the freedom it provides for your homestead, DIY projects, and emergencies. You've ditched those tangled extension cords, but now comes the ultimate question for true energy independence: how do you keep that powerhouse charged when you're miles from a wall outlet?
The answer, of course, is the sun!
Portable solar panels are the unsung heroes of off-grid living, offering free, clean, and silent power whenever the sun shines. They transform your portable power station into a truly self-sufficient energy hub. In this guide, The Frugal Footprint will break down everything you need to know: from understanding the key specs, to choosing the right panels (including options from EcoFlow and BLUETTI), setting them up for maximum efficiency, and even safely maximizing the gear you already own. Get ready to tap into an endless supply of sunshine power!
Why Go Solar? The Frugal Footprint's Case for Sunshine Power
Beyond the undeniable cool factor, integrating portable solar into your setup brings practical, frugal, and sustainable benefits:
Free Energy, Forever: Once you've made the initial investment, the fuel for your power is literally falling from the sky. No more gas generators, no more trips to the pump, and significantly reduced utility bills.
Sustainable & Clean: Zero emissions, zero noise pollution. Solar power is kind to your wallet and even kinder to the environment, aligning perfectly with a frugal, resilient lifestyle.
Silent Operation: Unlike noisy gas generators that disrupt the peace of your homestead or campsite, solar panels work in complete silence. Enjoy the sounds of nature, not an engine.
Ultimate Portability & Resilience: Paired with a portable power station, solar panels mean true off-grid power anywhere the sun shines. It’s the ultimate setup for remote work, extended camping, emergencies, or simply working far from an outlet.
Emergency Preparedness: When the grid goes down, your solar setup becomes an endless, silent power source, keeping essentials running for as long as the sun rises.
Understanding Portable Solar Panels: Key Specs for the Frugal Homesteader
Navigating the world of solar panels can feel daunting with all the technical jargon. Let's demystify the essential terms you need to know to make an informed, frugal choice:
Wattage (W): Your Power Potential
What it means: This is the panel's maximum theoretical power output under ideal laboratory conditions (often called Standard Test Conditions, or STC). So, a 220W panel could produce up to 220 watts of power.
Reality vs. Expectation: This is crucial! In the real world, you will almost never see 100% of the rated wattage. Factors like clouds, panel angle, time of day, dust, and temperature all reduce output. Expect to see 60-80% of the rated wattage in good, direct sunlight, and even less on cloudy days. Higher wattage still means faster charging for your power station, but manage your expectations for peak performance.
Efficiency: How Well It Converts Sun
What it means: This percentage tells you how effectively the panel converts the sunlight it receives into usable electricity. Higher percentages (e.g., 20-23%) mean more power from a smaller physical panel.
Types (Briefly): Most portable panels for power stations are Monocrystalline, known for their high efficiency and good performance in lower light conditions.
Panel Type/Form Factor: Portable & Practical
For portable power stations, you'll almost always be looking at Foldable Portable Solar Panels. These are designed to be compact, lightweight, and easy to set up, fold away, and transport. Some, like the EcoFlow 220W Bifacial panel, are even "bifacial," meaning they can capture some light from the back, potentially boosting overall output.
Connectors: Making the Connection
MC4 Connectors: This is the industry standard for solar panels – rugged, waterproof plugs that securely connect panels to charge controllers or power stations. Many third-party panels use this.
Proprietary Connectors: Brands like EcoFlow (often using XT60) and BLUETTI frequently use their own multi-pin connectors for their direct inputs, as they can sometimes handle higher currents or simplify user experience. However, they usually provide MC4 to proprietary adapter cables with their panels, making them versatile. Always check what cables/adapters come included!
Durability & Weather Resistance (IP Rating): Built for the Outdoors
Look for an IP (Ingress Protection) rating, which indicates resistance to dust and water. Panels with ratings like IP67 are highly resistant to dust and can withstand water splashes or brief immersion, making them ideal for outdoor use on your homestead or campsite.
Solar Charging Case Study: How Long to Power Up Your EcoFlow RIVER 2 Pro?
Understanding the specs is one thing; seeing how it plays out in the real world is another. Let's look at a realistic scenario for charging your 768Wh EcoFlow RIVER 2 Pro using an EcoFlow 220W Bifacial Portable Solar Panel.
The Goal: Fully charge your 768Wh EcoFlow RIVER 2 Pro from 0% to 100%.
Key Factors for Realistic Expectations:
Rated Panel Output: 220 Watts (under perfect lab conditions).
Real-World Output: Expect 60-80% of rated wattage in good, direct sun (130-180W), dropping significantly with clouds or poor angle.
Power Station Efficiency: Power stations aren't 100% efficient in converting solar input to battery storage; EcoFlow is excellent, but expect around 90-95% efficiency.
Effective Sun Hours: While there might be 10-12 hours of daylight, only 4-7 hours typically provide strong, effective solar energy. Early morning and late afternoon sun are much weaker.
Scenario A: Ideal Summer Day (Clear Skies, Optimal Angling)
Average Effective Panel Output: Let's assume 180W (achieved by consistently angling the panel towards the sun).
Net Charging Rate (into battery): 180W * 0.90 (efficiency) = 162 Watts.
Calculation: 768 Wh / 162 W = ~4.75 hours of sustained peak charging.
Real-World Takeaway: If you set up your panel during the best part of the day (e.g., 10 AM to 3 PM) and manually adjust its angle every 1-2 hours to track the sun, you can realistically achieve a full charge within one strong, clear day.
Scenario B: Moderate Spring/Fall Day (Good Sun, Occasional Haze/Clouds, Less Intense Angle)
Average Effective Panel Output: Due to slightly weaker sun and less perfect conditions, let's estimate 115W.
Net Charging Rate (into battery): 115W * 0.90 = 103.5 Watts.
Calculation: 768 Wh / 103.5 W = ~7.4 hours of charging.
Real-World Takeaway: To accumulate 7.4 hours of effective charging, you'd likely need to charge over one full day of good sun (e.g., 8 AM - 5 PM with some adjustments) or, more practically, spread it over two days if conditions are less than consistently perfect or you can't continuously adjust the panel. Expect a full charge over 1.5 to 2 days.
Scenario C: Cloudy/Winter Day (Poor Sun, Low Angle)
Average Effective Panel Output: With very diffuse light and a low solar angle, expect a much lower output, perhaps 45W.
Net Charging Rate (into battery): 45W * 0.90 = 40.5 Watts.
Calculation: 768 Wh / 40.5 W = ~19 hours of charging.
Real-World Takeaway: With only 6-8 hours of limited daylight, charging would stretch over multiple days (e.g., 3-5 days or even more) to achieve a full charge. Solar charging in winter or heavily overcast conditions is more about maintaining a charge or slowly recuperating power rather than rapid recharging.
Key Deviations from Peak Sunlight Hours to Remember:
Clouds: Even light clouds can cut output by 50-70%. Heavy overcast conditions can reduce it by 80-90% or more.
Panel Angle: Deviating from a direct 90-degree angle to the sun significantly reduces output.
Temperature: Surprisingly, hot panels are less efficient. Panels perform best in cool, sunny conditions.
Shade: Even a small shadow on one part of a panel can drastically reduce the output of the entire panel.
Conclusion of Case Study: While the EcoFlow 220W Bifacial panel is powerful, real-world solar charging requires patience and optimal setup. Plan for 1 full day on excellent summer days, 1.5 to 2 days on moderate days, and multiple days during winter or heavy clouds. This honest expectation ensures you get the most out of your solar investment.
What Size System Do You Need?
This case study shows the math for recharging, but what about your daily use? How many panels and batteries do you really need to run your gear all day?
Stop guessing. Use our Solar Panel & Battery Sizing Tool to calculate your exact needs for your shed, cabin, or campsite based on your specific appliances.
This tool is part of our free, gated tool hub.
An Important Note: Solar Panels & Direct Device Charging
Can you plug a portable solar panel (like an EcoFlow or BLUETTI panel) directly into your phone, laptop, or a small USB power bank? Generally, no, and it's not recommended. Portable solar panels output a variable DC (Direct Current) voltage that fluctuates wildly with sunlight. Your sensitive electronics (and even most small power banks) require a very specific, regulated voltage (like the 5V from a USB port or 19V for a laptop).
This is why your portable power station is essential! It acts as the intelligent middle-man, regulating the incoming solar power and converting it into stable, safe power for all your devices (AC outlets, USB ports, 12V outputs). Think of it as your solar power hub that protects your valuable gear.
Maximizing Existing Gear: Can Your Old Device Be Solar Charged? This is where it gets interesting for the frugal homesteader! If you already own a smaller power station, a larger portable power bank, or even a jump starter with a DC input, it's possible your new portable solar panel could charge it with the right adapter. Many jump starters, for instance, have a DC input port (often a round 'barrel' plug) meant for a wall charger.
Here's how to check if it's possible and safe:
Find Your Device's Input Specs: Look on the device itself, in its manual, or on the original wall charger for its "Input" specifications. You're looking for numbers like "DC 12V / 3A" or "Input: 18V - 24V." This tells you the voltage range and amperage it expects.
Match the Voltage: Your solar panel (or its controller/adapter) needs to output power within that specified voltage range. For example, if your device says "Input: 18V - 24V," don't connect a panel that outputs 30V.
Match the Connector: This is often the trickiest part. Ensure your solar panel's cable (or an adapter it comes with) physically fits and matches the polarity of your device's input port.
Need the Right Adapter? Many solar panels, especially from brands like EcoFlow and BLUETTI, come with a variety of common adapters (like MC4 to XT60, or MC4 to DC barrel plugs with multiple sizes). However, for specific needs, you might require an additional adapter.
Taking these simple steps to match voltage and connector type is crucial for safety and preventing damage to your existing valuable gear.
Our Top Portable Solar Panel Recommendations
Choosing the right panel depends on your power station's input capabilities and your budget. Here are some top picks that offer great value and performance for the frugal homesteader:
EcoFlow Portable Solar Panels (Seamless Integration for EcoFlow Power Stations):
EcoFlow's panels are designed for perfect compatibility with their RIVER and DELTA series. They are known for their robust build and integrated cables.
EcoFlow 160W Portable Solar Panel: An excellent all-rounder, offering a great balance of power output and portability. Ideal for charging smaller to mid-size power stations.
EcoFlow 220W Bifacial Portable Solar Panel: For faster charging of larger stations like the EcoFlow RIVER 2 Pro, this bifacial (two-sided) panel offers higher output and improved efficiency by capturing light from both sides.
Pros: Guaranteed compatibility with EcoFlow power stations, high quality, often include essential adapters (like MC4 to XT60).
Cons: Can be slightly pricier per watt than some generic options.
BLUETTI Portable Solar Panels (Robust & Versatile Options for BLUETTI & Beyond):
BLUETTI offers a strong line of portable solar panels that boast excellent durability and efficiency, making them a fantastic choice whether you have a BLUETTI power station or another brand.
BLUETTI PV100 Portable Solar Panel (2-Pack): A popular choice, offering 200W of reliable power, a solid build, and good value.
BLUETTI 350W Portable Solar Panel: For those needing even faster charging or with larger power stations, the 350W panel provides substantial output.
Pros: Robust construction, often competitive pricing, excellent efficiency, come with MC4 connectors (making them versatile for other brands with appropriate adapters).
Cons: May require specific adapters for direct plug-and-play with some non-BLUETTI power stations.
Setting Up & Optimizing Your Solar Charging for Maximum Power
Getting the most out of your solar panels isn't just about wattage; it's about smart deployment:
Angle is Key: This is the most crucial factor! Angle your panels to be as perpendicular (direct) as possible to the sun's rays. Adjust them every 1-2 hours as the sun moves across the sky for optimal performance. Many portable panels come with adjustable kickstands to make this easy.
Avoid Shade at All Costs: Even a small shadow cast by a tree branch, building, or even a leaf on just one part of your panel can drastically reduce the output of the entire panel, sometimes by 50% or more.
Clean Panels: Dust, dirt, pollen, and bird droppings will reduce efficiency. A quick wipe with a damp cloth can make a noticeable difference.
Direct Sunlight: The clearer the sky, the better. Overcast days will still generate some power, but significantly less than direct sun.
Connecting to Your Power Station: Once positioned, simply plug your solar panel cable into your power station's solar input port. Your power station's display will show the incoming wattage.
Safety First: Portable Solar Panel Best Practices
While portable solar is generally very safe, a few common-sense precautions will ensure years of trouble-free operation:
Keep it Dry: While many panels are weather-resistant (check their IP rating), always ensure connectors are dry and clean before plugging anything in. Never handle wet cables or connections. Avoid prolonged exposure to heavy rain unless the panel is specifically rated for it.
Inspect Regularly: Routinely check cables and connections for any signs of damage (fraying, cracks, discoloration). Damaged electrical components can pose a risk.
Ventilation: Ensure panels (and the power station they're charging) have adequate airflow, especially when operating in direct sun, to prevent overheating.
Secure Panels: Portable panels can be lightweight and catch the wind easily. Use stakes, weights, or tie-downs to secure them against gusts, preventing damage or injury.
Handle with Care: Solar panels can get hot to the touch in direct sunlight. Allow them to cool before folding or packing.
Keep Clear: During operation, keep panels and all associated cables out of reach of children and pets.
Beyond the Power Station: Solar for Car Batteries?
A common question is whether you can use these portable solar panels to charge your car battery. Directly connecting a portable solar panel to a car battery is generally not recommended without a dedicated solar charge controller. Car batteries require specific charging profiles (multi-stage charging, float charge) to prevent damage from overcharging or undercharging. Plugging a raw, unregulated solar panel directly into a car battery can shorten its lifespan or even damage it.
The Frugal Footprint's Solution: The safest and most controlled method is to charge your portable power station first with the solar panel. Then, use your power station's regulated 12V car socket output (with an appropriate adapter, like a cigarette lighter to alligator clips) to trickle charge or maintain your car's battery. This leverages the power station's advanced internal safety systems to protect your vehicle. For long-term car battery maintenance with solar, a small, dedicated solar trickle charger with a built-in controller is your best bet.
The Frugal Footprint's Verdict & Your Next Step
Portable solar panels are the key to true energy independence. They turn your power station from a limited "battery" into an endless, self-sufficient energy source.
You've learned the specs, you've seen the real-world math, and you've calculated your own needs. Now, it's time to get your gear.
Path 1: Shop for Your Panels & Kits
I've curated all my top recommendations—from all-in-one solar generator kits (station + panels) to the best standalone panels from Bluetti and other top brands—all on our new Shop Page.
[Go to the "Solar Kits & Chargers" Shop →]
Path 2: The "Must-Have" Adapters
If you're building a DIY setup with different brands, you'll need the right adapters. My Amazon list includes the essential MC4 kits and DC adapters to connect any panel to any station.
[Shop DIY Solar Connectors on Amazon →]
Path 3: The Next Step in Your Journey
Now that you've mastered portable power, are you ready to plan a larger, fixed system for your homestead?